Pages

Monday, September 15, 2014

The Shining Chair

This is going to be a long post. My room mate. April, asked if I could recover this amazing antique chair that she purchased from an estate sale. There were a lot of pieces to this project, but it's probably my best furniture work to date. I bring you:
THE SHINING (Chair)
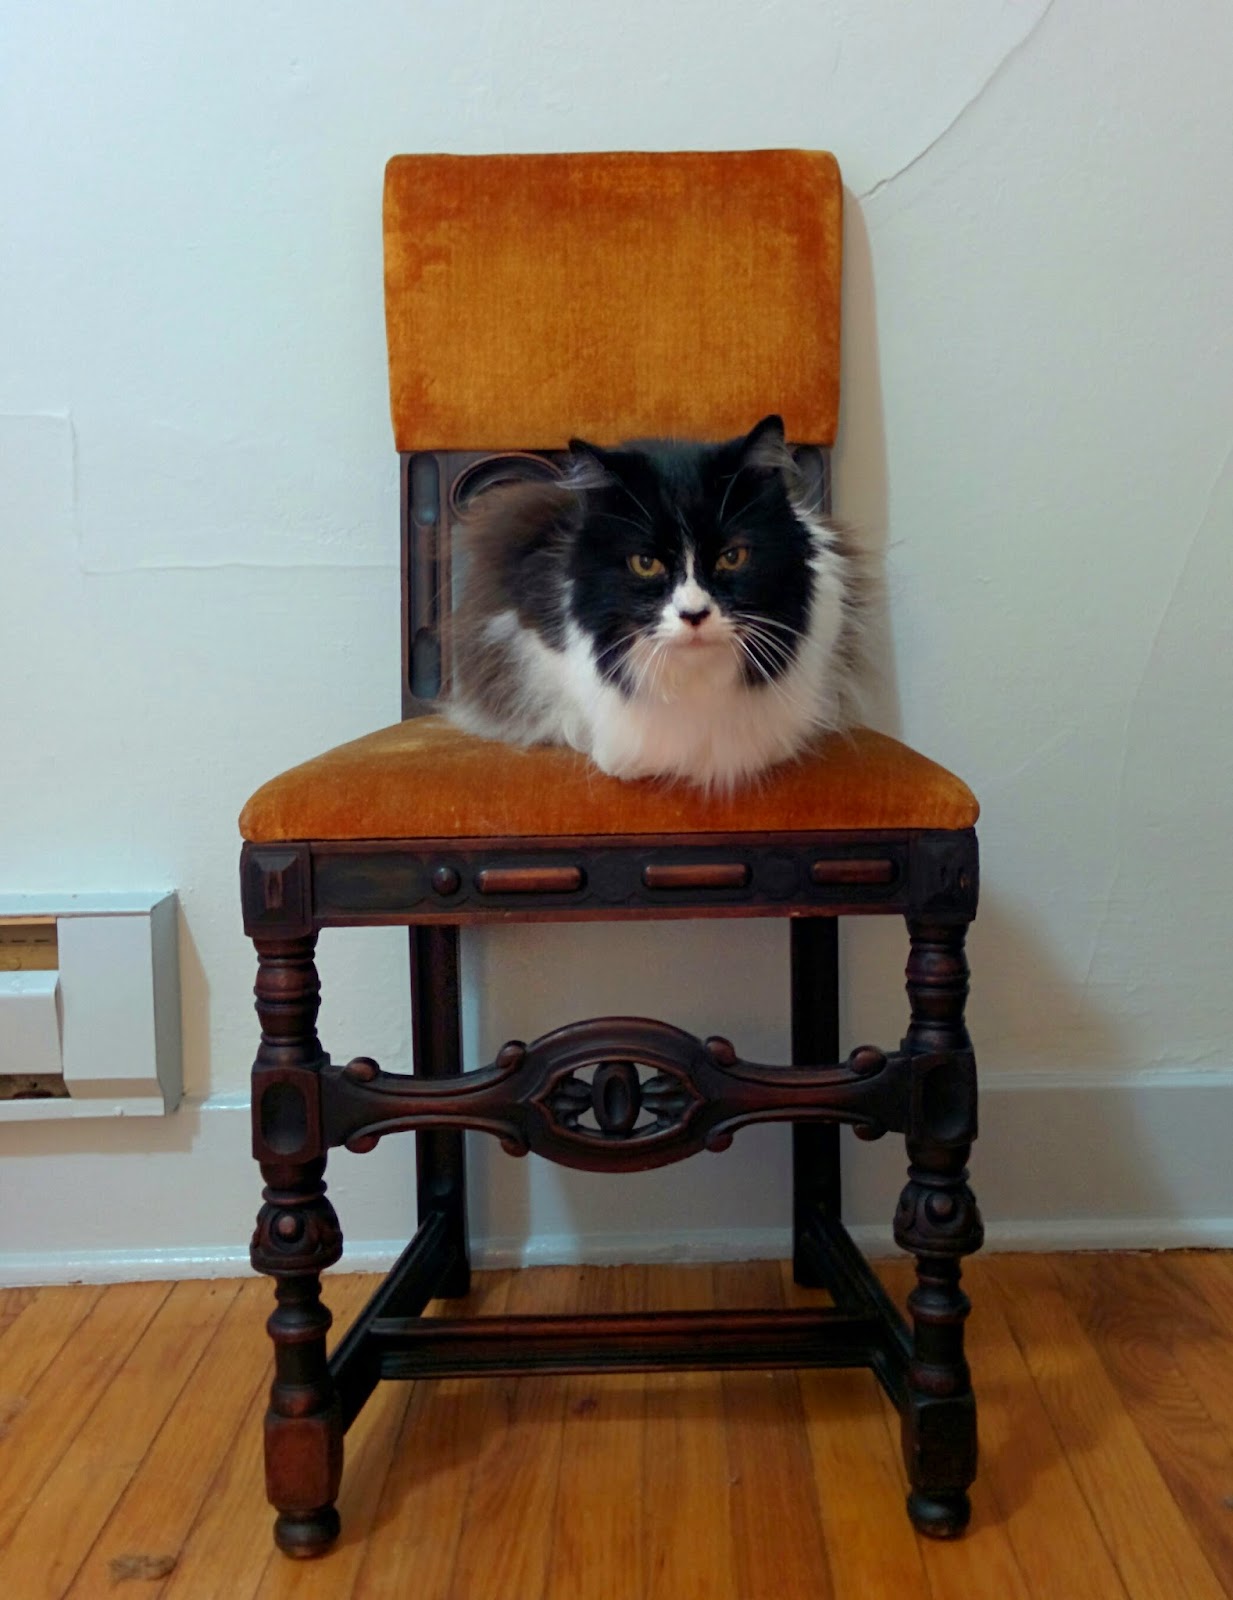
Here's the chair. Cat for scale. That's Audun. 

Here's the inspiration. This is a hallway scene from the hotel in Kubrick's "The Shining".

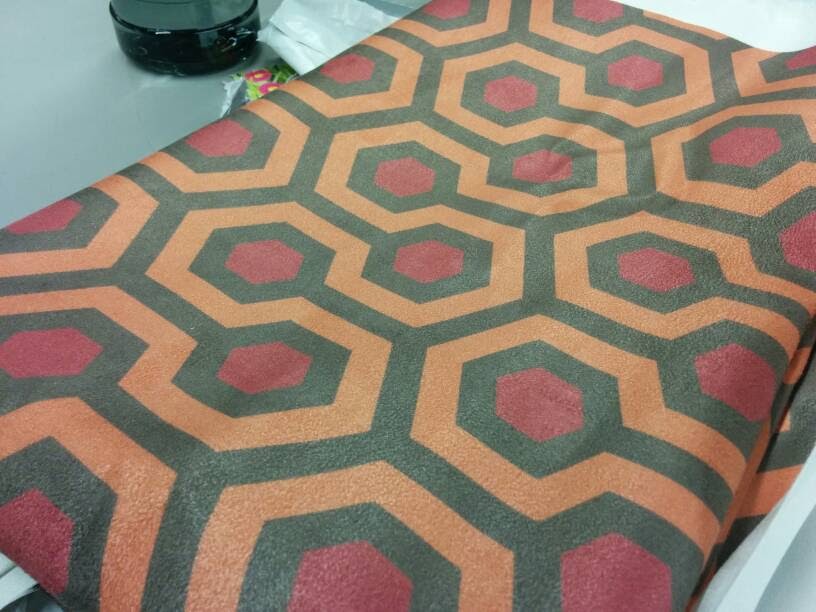
April ordered this custom print faux suede by Salg, from Spoonflower.

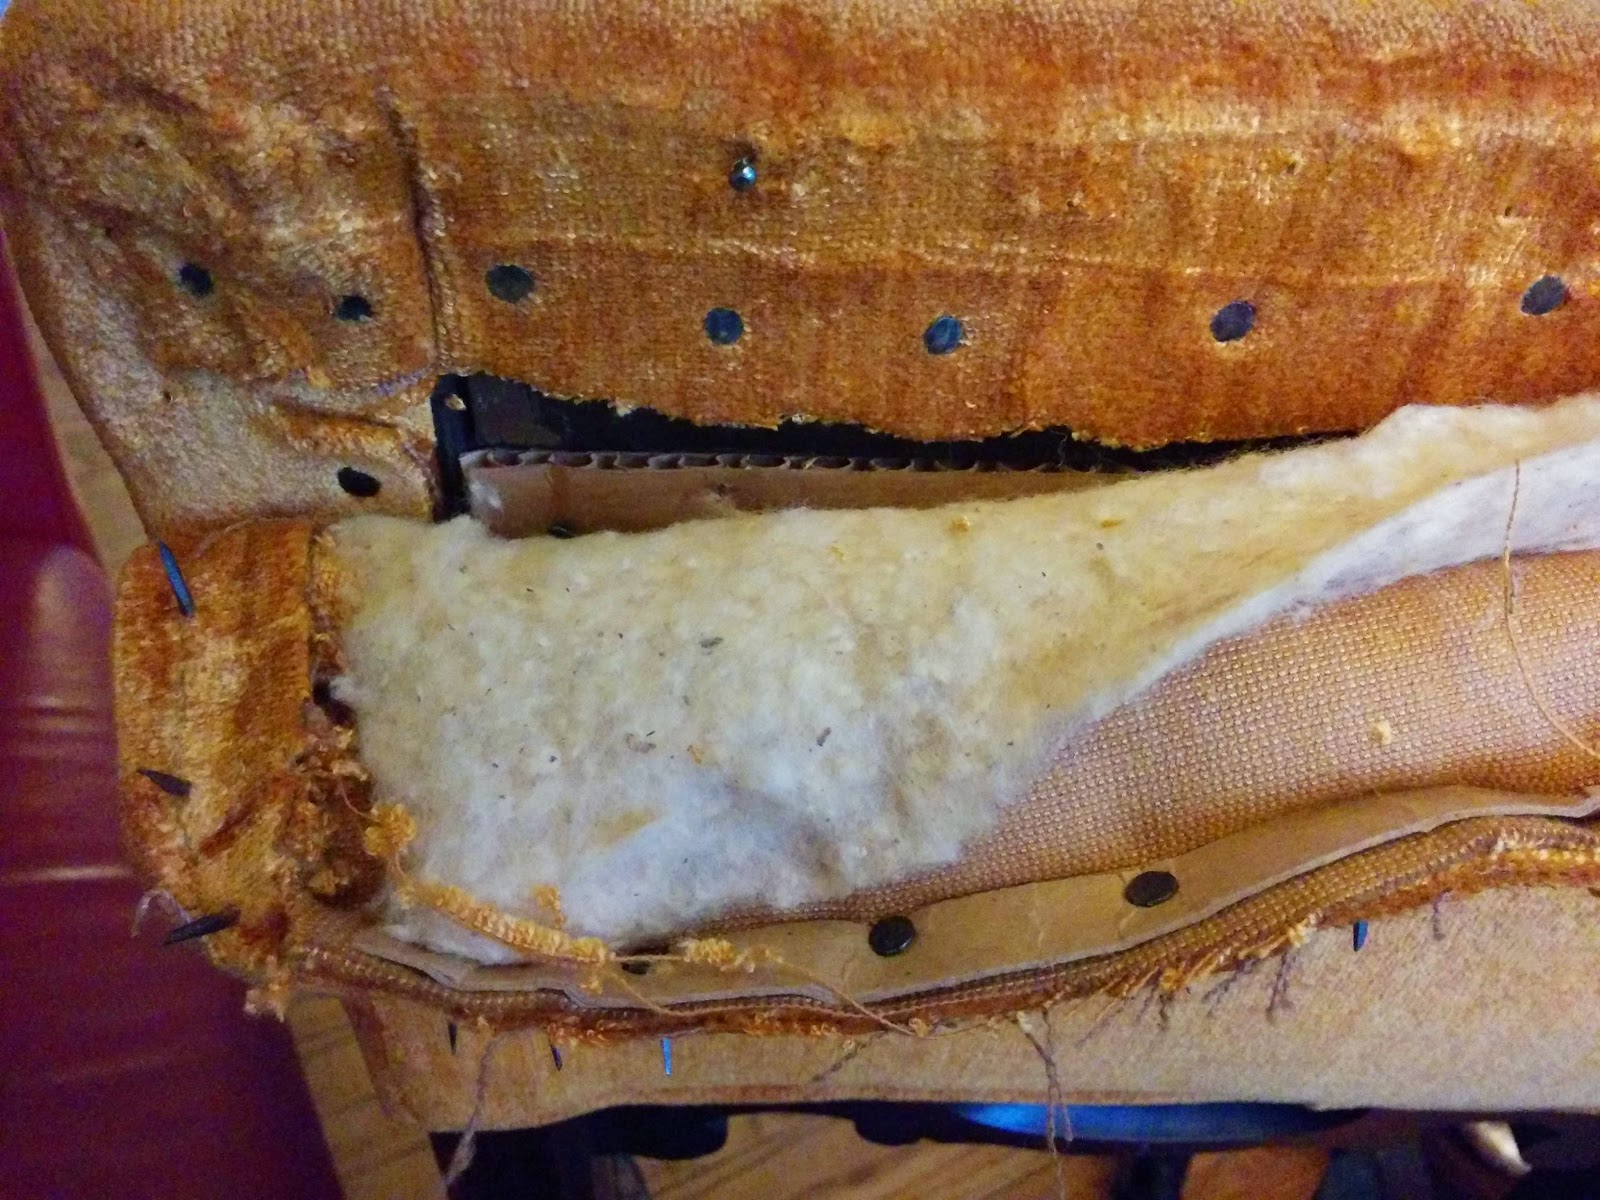
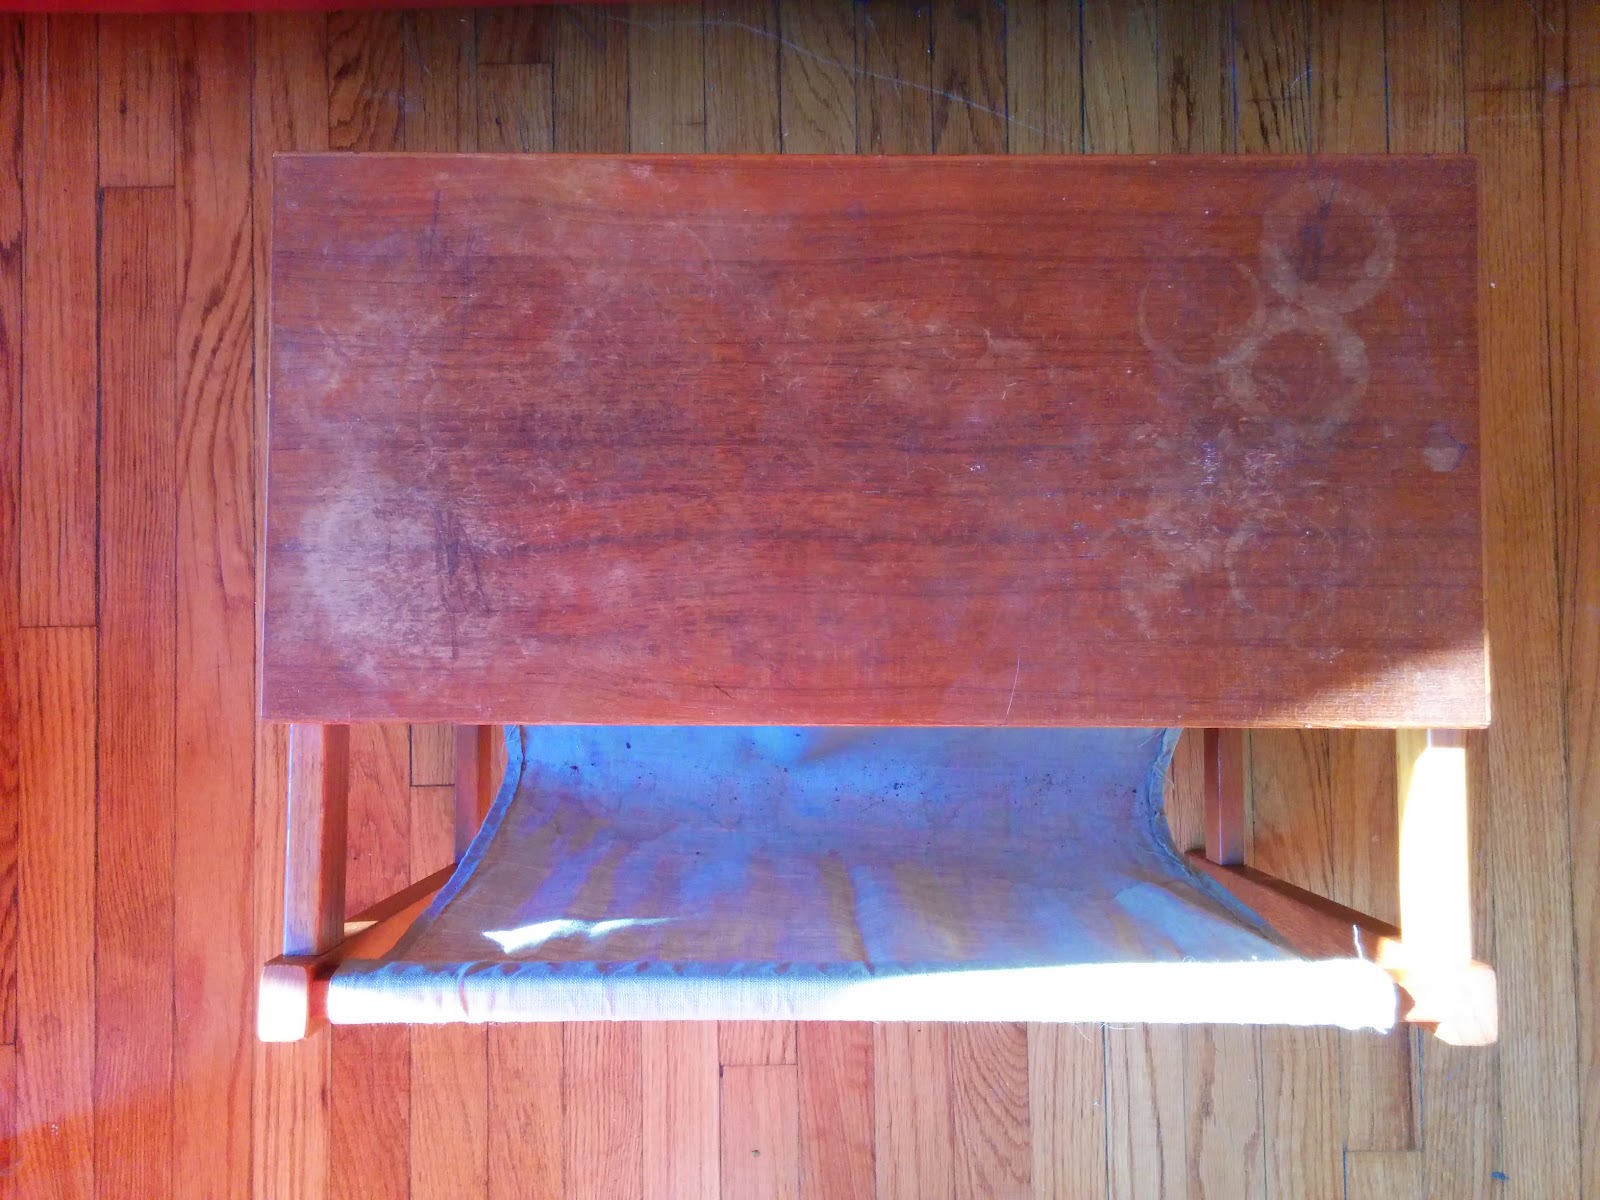
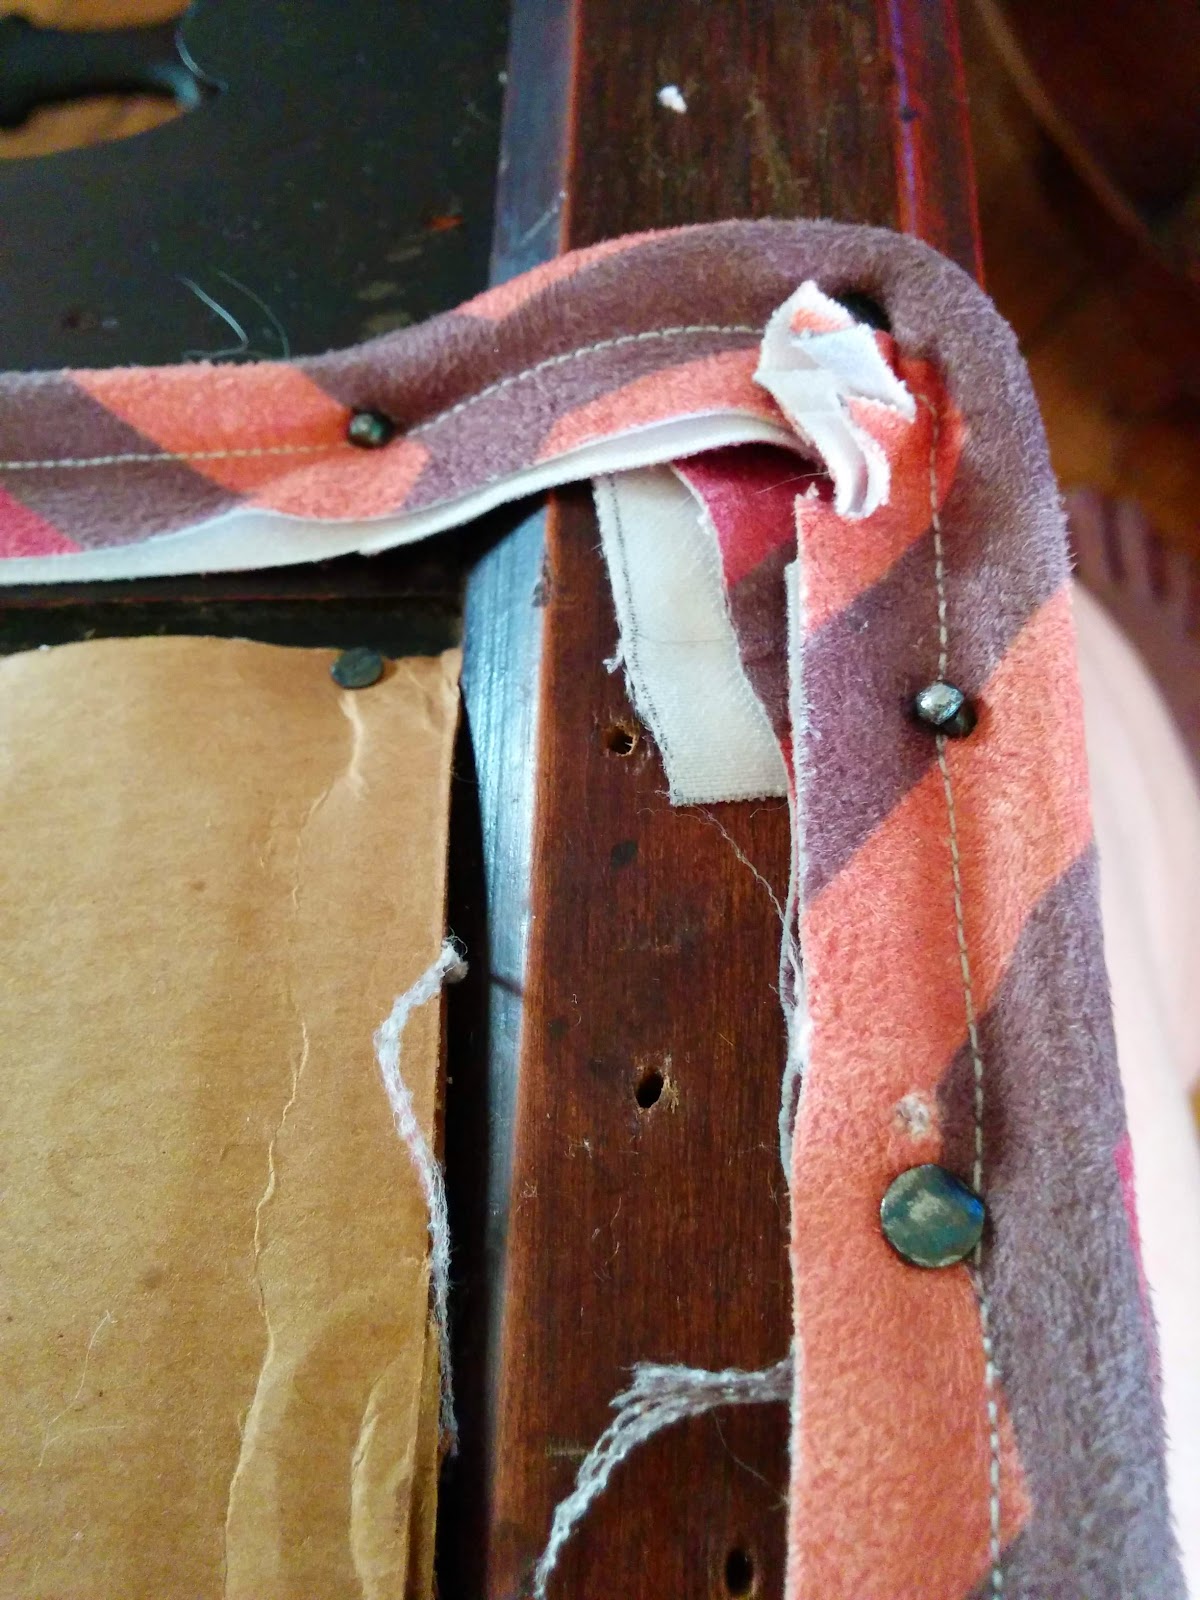
Here's the removal of the rear panel on the back. Note the tacking strips and actual nails instead of staples. There's a bit of cardboard in there for stiffening, and it's in great shape.

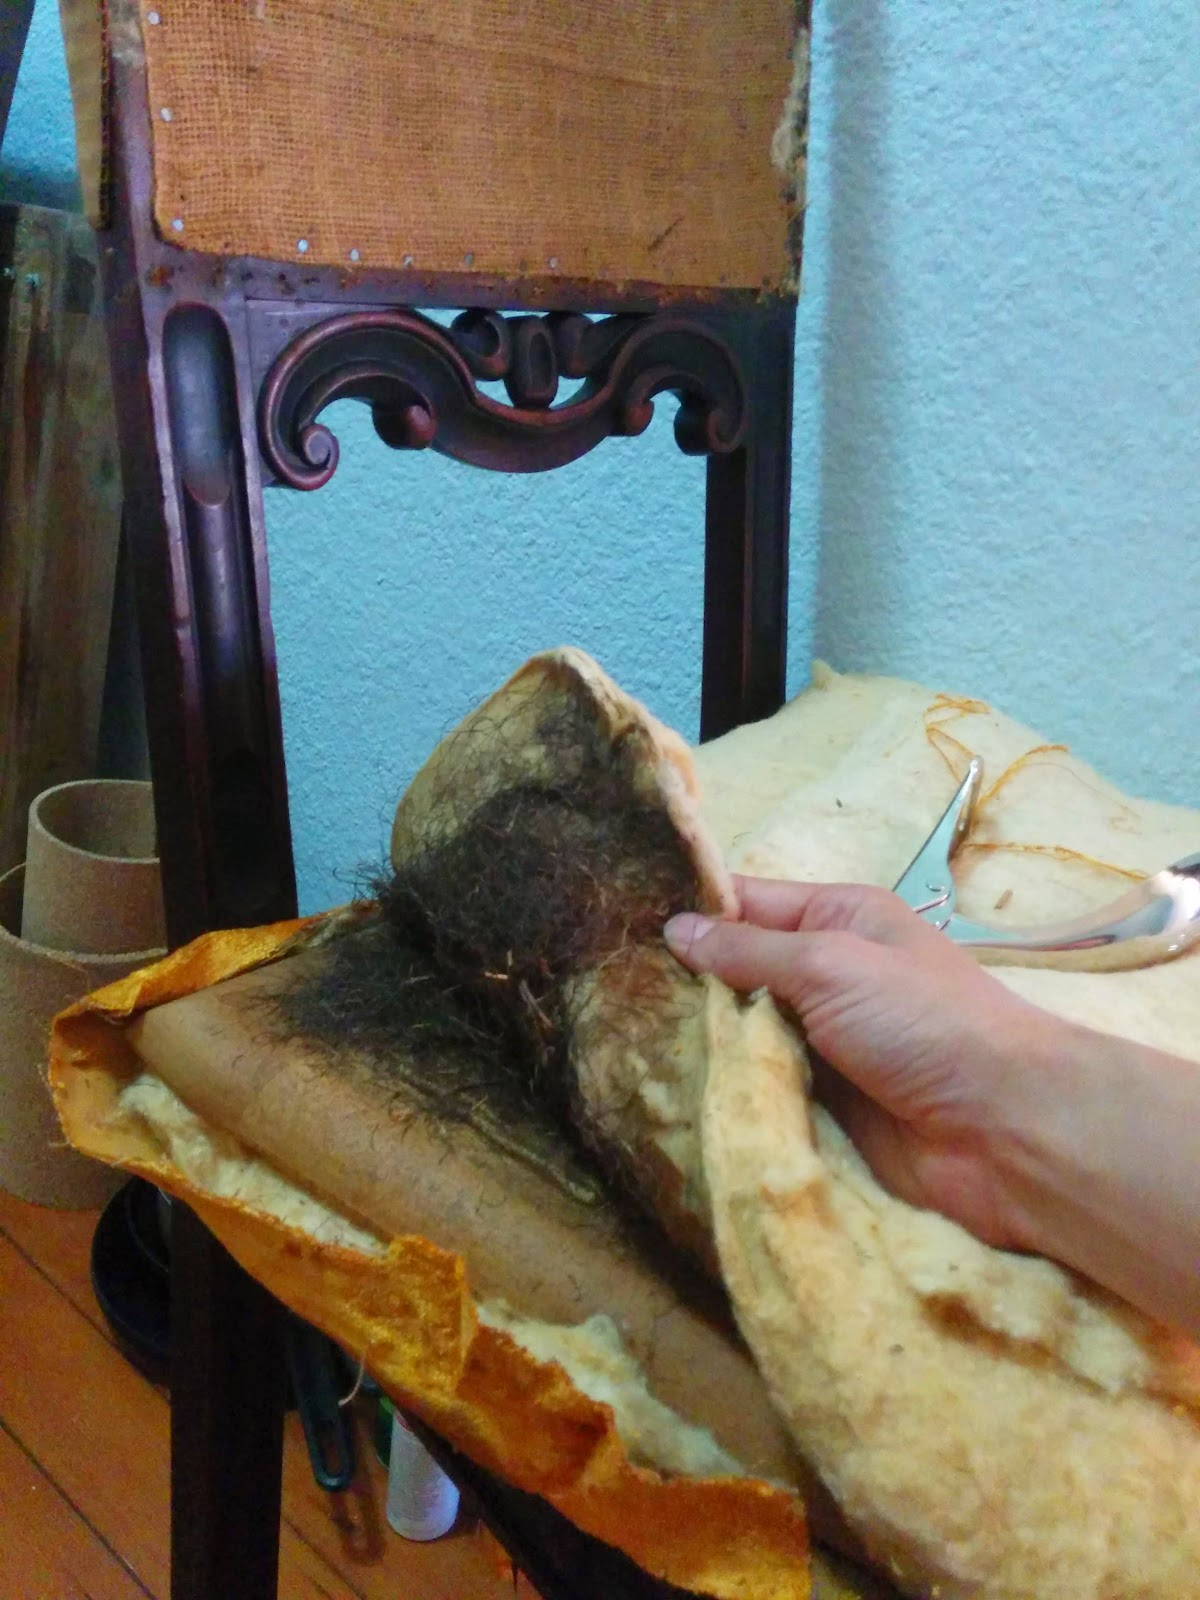
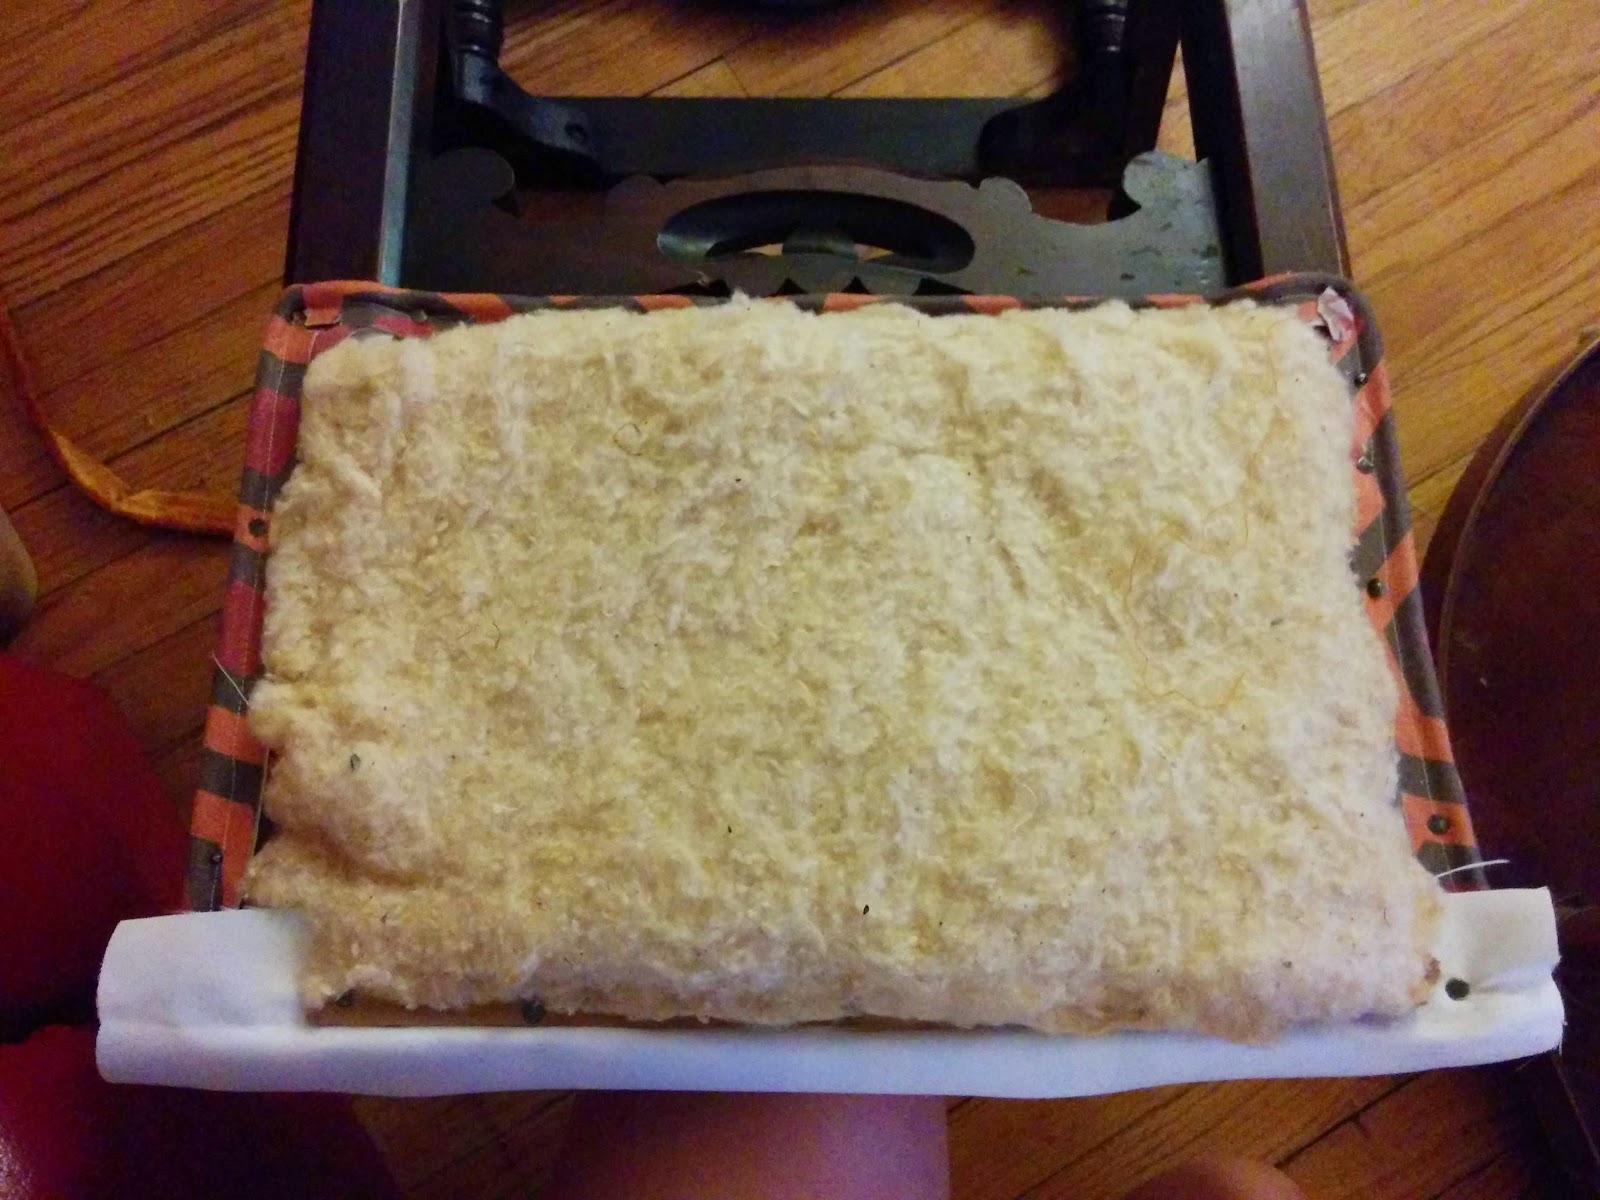
Spanish moss. This dates the chair to sometime between 1890 and 1960.

Here's the naked chair. We're thinking around 1930, Spanish Colonial from the scrollwork, nails and moss. 

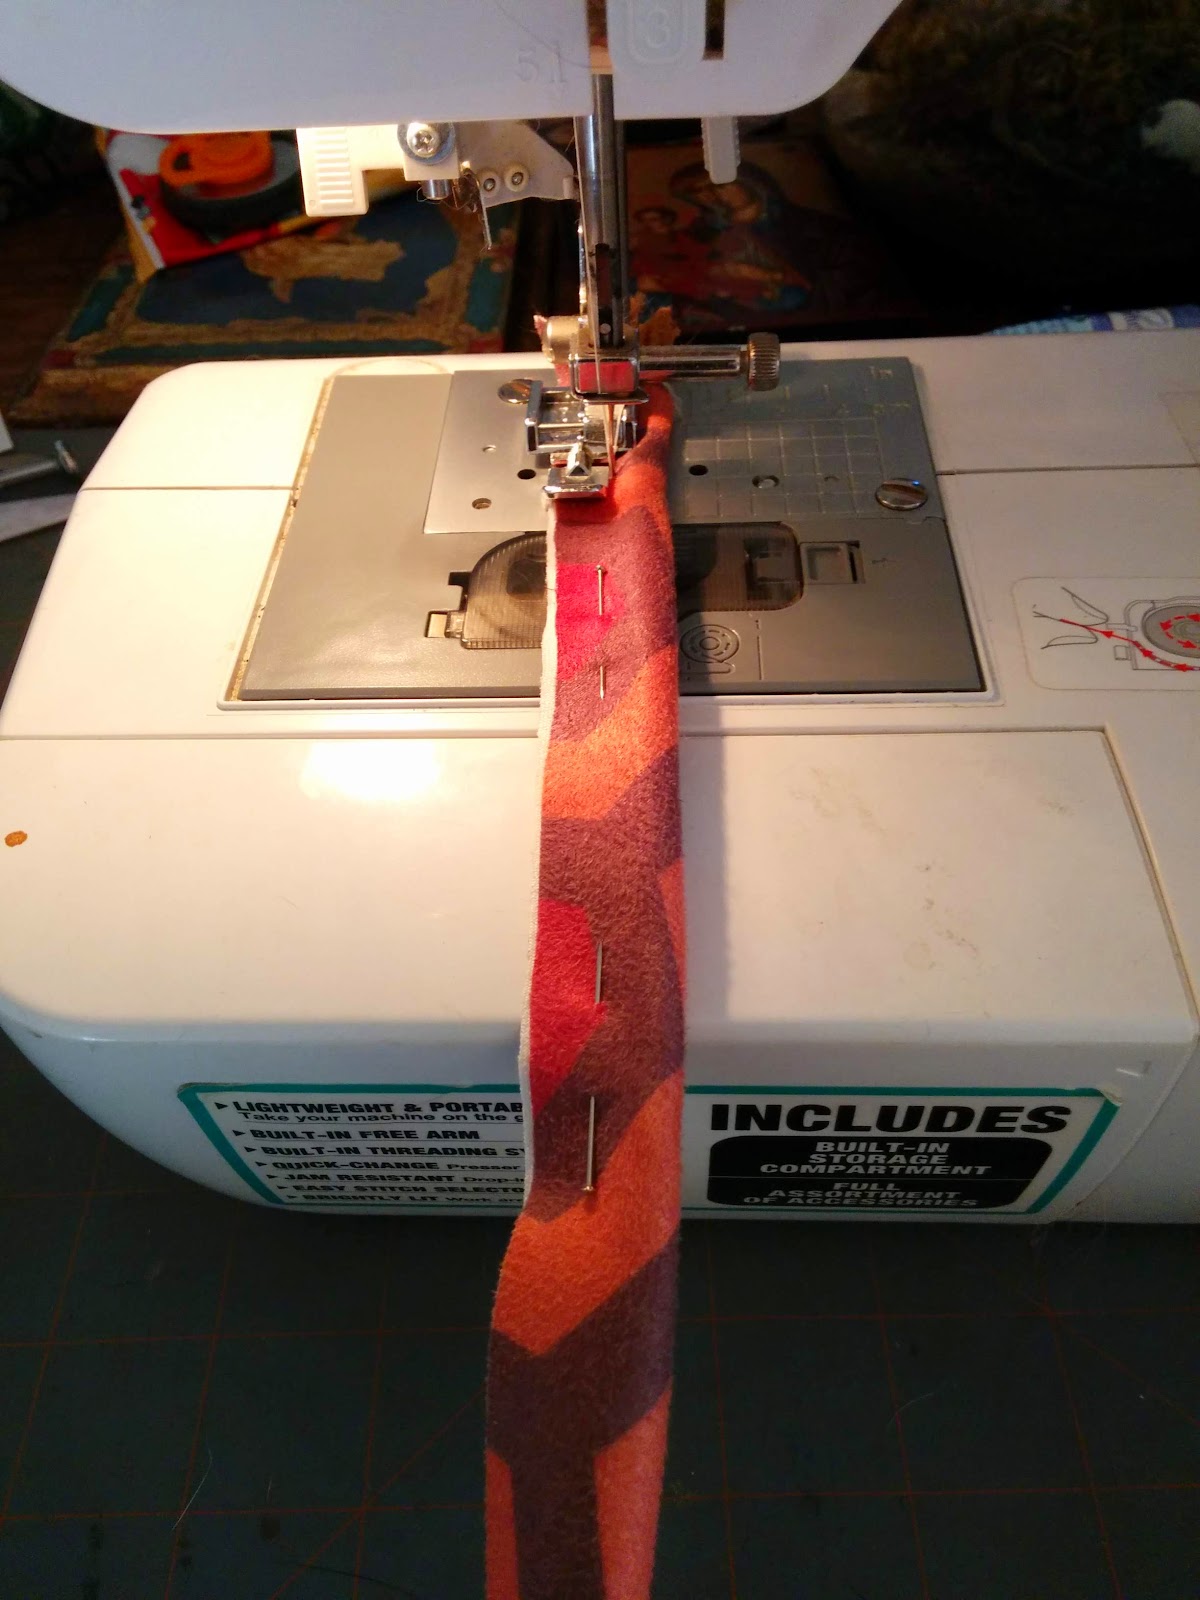
This fabric is basically a stripe, so I'm treating it as such in aligning it.
The center is pinned so I can align front to back. I cut this panel first, then the upper panel. I wanted the illusion of the hexes joining from seat to back. This took a bit of work, since I had to compensate for the width of the seat cushion.


I didn't take pictures of the tacking of the bottom, but it works the same as the back. I tacked the bottom of the fabric on the front, lining up the edges of the hexagons, then pulled the fabric evenly around the batting to the back.


The corners are folded and carefully molded to form a single crease on the side. I cut away the excess fabric to get the edges to lay flat. Here, I'm aligning the remaining fabric to create the back panel. I ran a thread for alignment to make the pattern wrap to the back of the chair. There's a generous seam allowance tucked underneath.

There was piping on the back of the back, which I replaced with new fabric. I cut out a bias strip from the remaining fabric. I reused the cord from the original piping to get the length. Piping must be cut on the bias (45 degree angle) or it won't be flexible.

I finally noticed my backward sewing. I pin along the seam, instead of perpendicular, usually upside down, and sew to the wrong side. It makes pin removal impossible, and working with wide fabric a pain. Still, I can't break the habit.

Here's the finished piping, being added to the chair back. I started at the bottom center, and tacked inside the piping seam for a close fit to the cord.

Corners are clipped and turned thusly.

The piping can hide some variation at the corner, if you are careful about tacking the two layers smoothly.

At the join, I stitched the two ends together. I would have simply layered on over the other, but the cord was a bit short for that method. The strongest thread I had was grey, so I just dabbed it with a black marker when I was done.

Once the piping was in, I tacked in the back panel that I cut previously. The alignment thread is flush against the piping cord. I used a tacking strip in the top edge.

Here is the aligned fabric. I lifted it up for this picture, to show how the hexes align even after the piping was installed.

The rear panel couldn't be tacked in, so it had to be sewn instead. A curved needle made the job so much easier. I passed it behind the piping and through the seam allowance of the panel, pulling the panel taught over the batting. The center stripe had to stay aligned during the process.

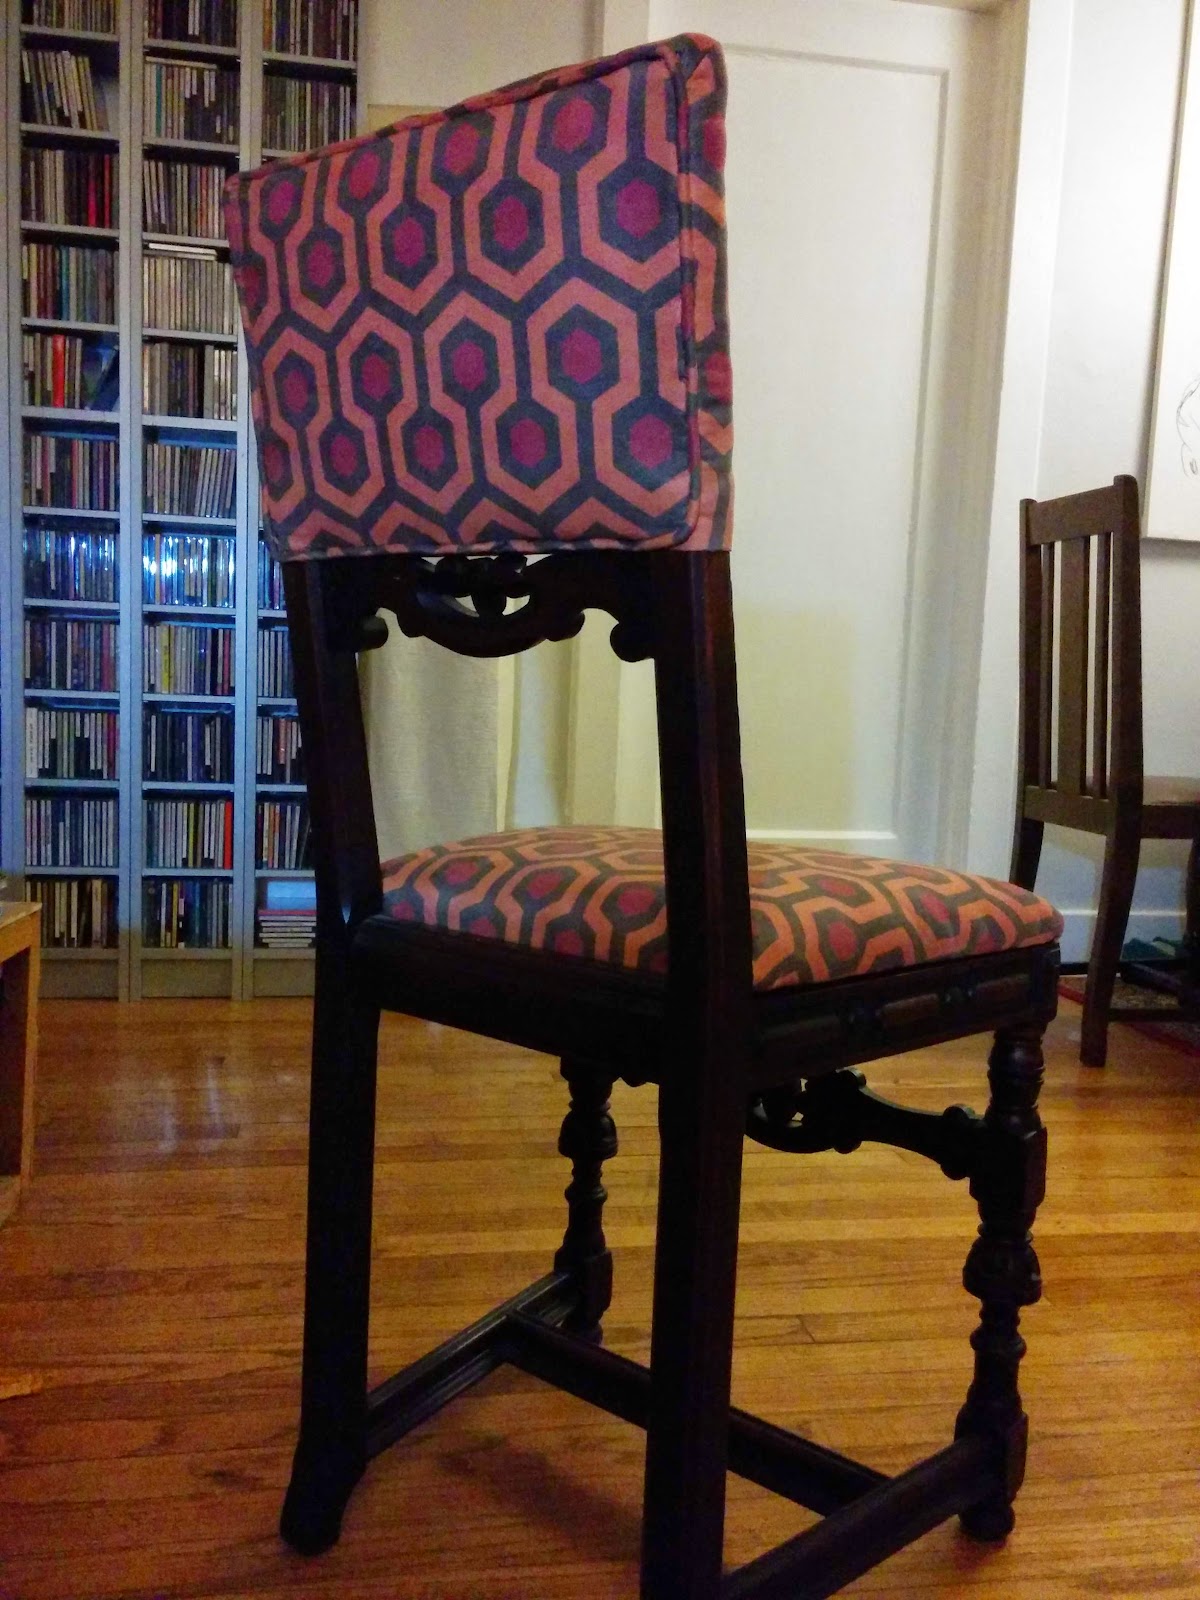
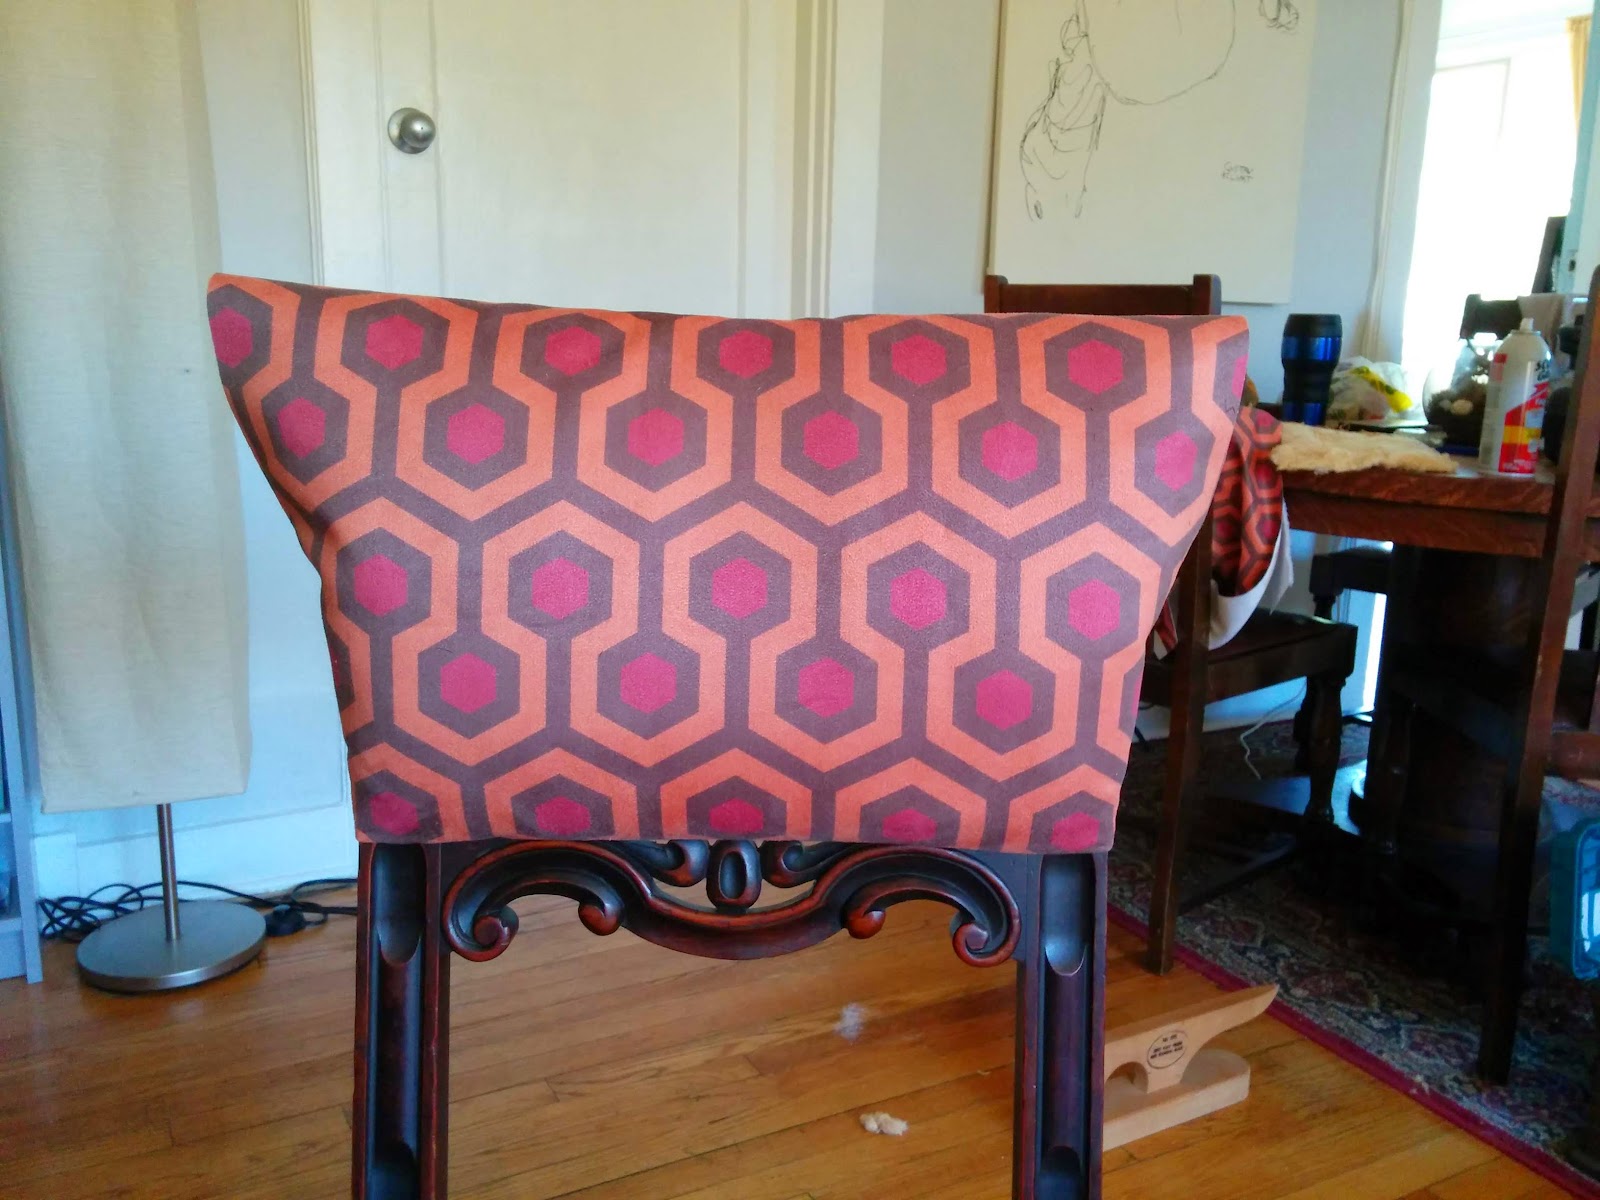
Here it is, completely installed.
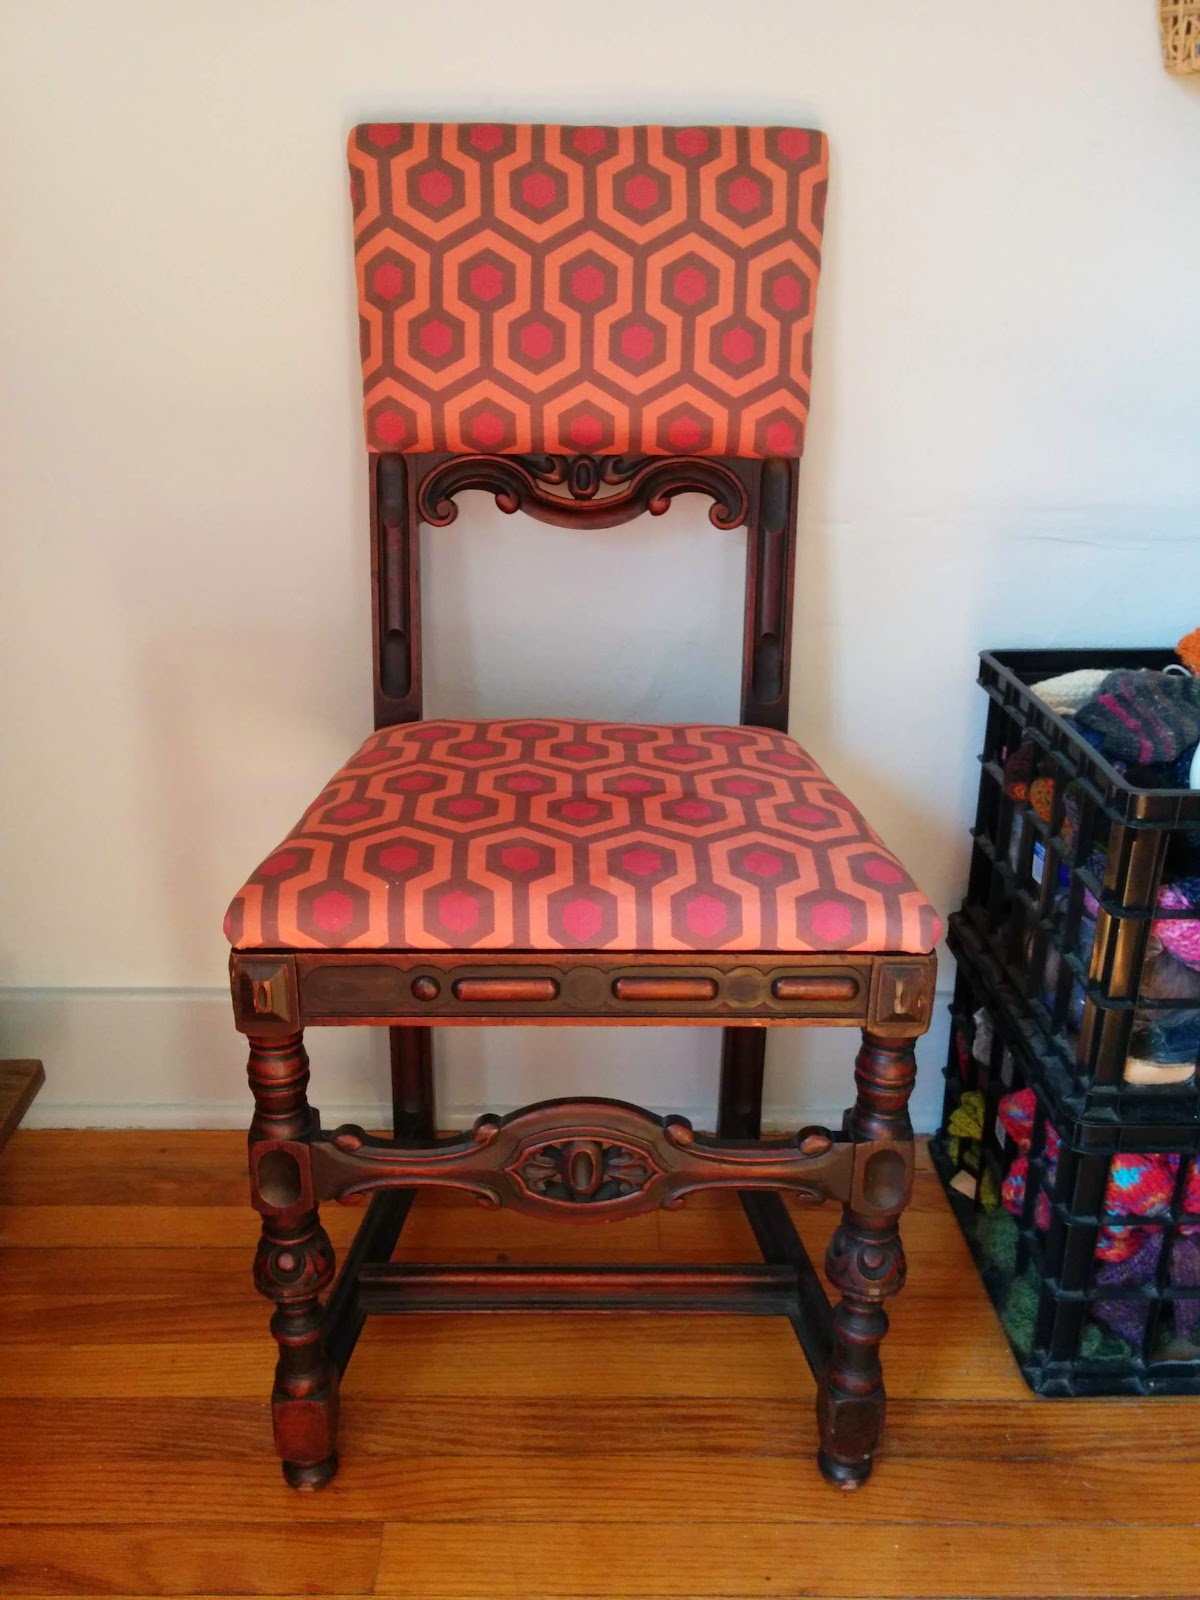
And from the front.

Sunday, August 10, 2014

Not quite diamonds on the soles of her shoes.

My brand new shoes turned out to not be great for actually walking around. The laser cut leather was cute, but tended to peel in layers if anything scuffed the toe or heel. As the soles are still comfortable, I wanted to repair the surface somehow. Bring on the trusty gilding kit!
Taped front toe on the first shoe as an experiment.
There's the kit. The toe is painted with adhesive size and allowed to dry.

Adding the gold leaf to the prepared heel.
Toe following the application of leaf. It was difficult to get a clean edge, so I decided to allow it to be rough.

Finished toe and heal. There's already a scuff on the toe, but I just slapped another piece of leaf on it to repair it. 
Now that the toes and heels are done, I've coated them with sealer, and look forward to seeing how they look as they wear. I won't consider the look finished until I've got some scuffing pattern to dim up the brightness a bit. However, I'm glad these are once again fit to wear with nice outfits.


Thursday, July 17, 2014

Central Space Unit 5

Okay, time for an apartment update!

You may remember the updates to our previous apartment:

Dear GOD, what is that YELLOW!
Oh, so clean! Refinished cabinets? WOW!

Crazy repainting, refinishing amazingness in Every. Single. Room.

We have moved...


...across the courtyard!

The larger corner apartment came available and with less than 700 square feet in our current place, we were tempted.

After doing all of the work on our #11, it was hard to leave. There was a lot of damage in the new unit and we'd need to paint again, but there was a lot more space for us and the pets.


CHALLENGE ACCEPTED.

Above the window, the wall board is bulging out. Note the yellow. Holy CRAP, the yellow.

The living room wall, after knocking out a bulge in the wall board. More on this below.

One kitchen wall, complete with funky plaster. This is how all of the wallboard bulges looked before, hence our hesitation.

Not only did we need to deal with the weird wavy walls, but we had odd sections of mis-matched paint to touch up. And that ceiling was FILTHY.


As you can see, once we filled. primed and painted, the walls were not only smooth, but the holes were completely indiscernible.

Check out above the window. Also, behind the couch. See anything? No? Yeah, we did that. 
I'll have a few more before/after photos in the next few days. We're still in process with the bathroom and kitchen, but that photo with the red couch? It was taken the day after we moved in. Feel free to gape at our awesomeness.

Special thanks to my AMAZING mother-in-law for her help with the painting.

Tuesday, July 15, 2014

Cat Bib

I was going to post about changes to our new apartment, but this is far more hilarious. After one too many birds and rats, we decided to try a kitty bib. It's basically a piece of thick fabric attached to the break-away collar. The idea is that the cat can move properly, but not pounce as easily, giving the prey time to escape. We used a scrap of neoprene, but leather or thick vinyl would also have worked.

An internet pattern.

Neoprene and a ruler.

A surprisingly calm cat. 
Iris is okay with this. She didn't seem to pay the bib any attention, and is moving normally throughout the house. We haven't swept the house yet to see if any carnage arrived during the night, but we are ever hopeful.

No more "presents", Iris.

Monday, July 14, 2014

Sweet Stakmore

 Here's a sweet little Stakmore Urn back folding chair that we also found near the dumpster. Man, people, have you never heard of Goodwill? Well, your loss is our beautiful find!

Cute.

Oh! It folds! Wow!

The frame was actually in great condition, just a few loose bolts. The cover...
GROSS.
A little staple removal, pad rinsing, a shellac touch-up, a bit of brocade, et viola:

Beautiful...

...and clever.
We listed this beauty on Craigslist, along with the magazine rack. It will be hard to see her go.

I have a really hard time letting furniture go...
Oh, Watchmaker's Desk. I'm so glad we kept you. <3
Yeah.


Sunday, July 13, 2014

Teak Side Table Restoration

We've been working on a lot of projects that I've not blogged. Such is my nature. I have quite the backlog, which I shall now publish, one a day, until I'm caught up.

Here's a cute little magazine table that we found by the dumpster after some tenants moved out.


Obviously, we couldn't leave it in this condition.

Sanding!
Where's the magazine sling?
We were surprised to find the frame was solid wood. The ends of the boards have very thick, quality veneer. This is not a Target special. 
Oh, THERE'S the sling!

Sanded and shellaced.

Finished!
We refinished the top and replaced the magazine sling with another in the same linen.  It's so very cute. Not bad for "garbage". 

Many more posts to follow!

Monday, November 11, 2013

We're in Italy! Let's paint some rabbits!


So far, we've had the whole Italian experience. I've made so much pasta fagioli and alfredo sauce that I'm seriously going to eat an entire brick of cheddar when I get home. (How does an entire country not have cheddar cheese?) Our flat was also robbed while we were out of town, which puts a huge damper on my computer training, as I now have no computer. The school loaned one to my husband for school work since we can't get the replacement shipped over. 

Most valuable item stolen - the husband's MacBook, complete with his entire portfolio. 
Most infuriating - my red and black 1928 and pearl necklaces. I can't replace these.
Most ridiculous - a half used can of Burt's Bees Miracle Salve. A grade A pomade indeed.

All of my art supplies and yarn were curiously left behind...

...LET'S PAINT SOME RABBITS!
Though I don't have an account, I was inspired by Deviant Art's Draw it Again contest. I'd previously made a book of Alice in Wonderland with rabbits for an art course. Those drawings are long gone, but the concept remains. I'm redrawing the scenes from before and adding in some new ones. Here's the first of the series.
Here's the initial idea for the hookah-smoking caterpillar. I changed the dynamic of the scene in the little sketch.

Pencil of the final concept.

Paint on the bunterpillar.

The water color is finished.

Added marker, ink and a Photoshop overlay to the stem of the mushroom. The colors are a bit screwy from the scanner, so I'll probably re-scan the watercolor layer and swap it to get the greens back. Still, I'm pretty pleased with where it is now.

That's about all I have to say about that.